Mastering Museum Maintenance | The Gallery Upkeep Checklist
![]()
Summary
In this article, we look at how to set a regular rhythm for inspections, what to check on protective barriers, how to keep labels and signage legible and level, what to audit in your hanging hardware between exhibitions, how to clean display equipment without harming its finish, and why a modest stock of spares saves time on busy days.
“An ounce of prevention is worth a pound of cure.”
– Benjamin Franklin, writing in The Pennsylvania Gazette, 1735
When the Burrell Collection opened in Glasgow’s Pollok Country Park in 1983, the building was celebrated as a fitting home for the vast collection that shipping magnate Sir William Burrell had gifted to the city in 1944.
Within a few decades, however, its flat roof had become a recurring problem. By 2009, leaks prompted urgent calls for repair funding, with Neil MacGregor, then director of the British Museum, admitting, “The state of the Burrell Collection building is a concern for everyone.”
Curators were left placing buckets to catch dripping water, and the leaking roof eventually forced the museum to close its mezzanine level. The museum closed entirely in 2016 and didn't reopen until 29 March 2022, after a £68.25 million redevelopment replaced the roof, glazing, and cladding of the Grade A listed building.
For modern gallery and museum teams, the hope is that the maintenance efforts are never tested so keenly, and yet there are far more common issues that must be kept on top of: from barrier cords losing tension to hanging sets that have seen one changeover too many.
Each is a minor fix on its own but, when left to accumulate, will wear down a gallery's presentation and, in some cases, the protection of the objects and visitors within it.
Below, we set out a practical upkeep checklist for facilities managers, operations teams and technicians, organised around the display equipment that tends to need attention most often. It draws on more than 30 years of designing and manufacturing museum-grade products, and on what that time has taught us about the long-term value of properly maintaining your equipment.
Protective barriers
Set a rhythm for your checks
Short, regular walk-throughs to catch problems before they escalateMost wear in a gallery happens gradually, making it easy to miss when you walk the same spaces every day. While a brief walk-through before doors open is often enough to spot visible issues, a closer weekly inspection gives you time to check fixings, floor sockets, and acrylic covers with greater scrutiny.
An exhibition changeover then provides the natural point for a full audit of hanging hardware and signage, with an annual review to plan replacements and budgets.
UK collections care guidance has long placed housekeeping at the centre of preventive conservation. The National Trust’s Manual of Housekeeping and the Collections Trust’s Benchmarks in Collections Care both treat routine inspection and cleaning as core collections care activities. The same thinking applies to the equipment that displays and protects those collections.
Keep a simple log of what was checked, what was found and what was done. Over a few months, patterns will start to appear: the barrier beside a busy café entrance needs attention, or the label holders in one gallery keep getting knocked. Such patterns then inform where to concentrate efforts, while the record gives you evidence when making the case for replacement budgets.
![]()
Protective barriers
Keep the line clean, straight and secure
The elasticated cord on Absolute’s range of protective barriers is designed to draw a straight, visibly discreet line in the air, so that the barrier remains subordinate to the architecture of the building and, indeed, the artwork itself.
When a cord starts to sag between posts, the barrier begins to look like the droopy rope it was designed to replace. Check that the cord is seated firmly in the top of each upright and that runs remain taut. After long service, any elastic will eventually relax, and a fresh length of Elasticated Barrier Cord restores the line in minutes. Lighter cords on heavily used routes will also benefit from a wipe or a swap when they start to show handling marks.
Every part of our barrier system, from the cord and top caps to Wall Terminators and Signage Adaptors, can be replaced or added individually, so a run can be refreshed or reconfigured while the barriers themselves stay in service.
While Barrier Top Caps are small, they’re certainly noticeable when missing. Absolute’s barrier tops are injection moulded to deter small fingers from removing them, though can still go astray when barriers are moved for events or cleaning. A few spare caps kept in the store mean the gap is closed the same day.
Freestanding and Essentials Barriers sit on non-skid, scratch-protecting pads that grip the floor and protect its surface, so they stand firm and leave no marks. When barriers are repositioned, a quick look underneath confirms the pads are present, clean and seated correctly, which keeps the protection layer working as intended.
For Floor Socket Barriers, keep the sockets clear of grit and check that each upright sits snugly. When a run is taken down, fit the flush plug, which leaves a smooth, trip-free stainless steel circle just 25mm across. For Surface Mounted Barriers, confirm that cover plates sit neatly over the base plates and that floor fixings remain tight, particularly on timber floors, which move with seasonal changes in humidity. Wall Terminators and Signage Adaptors should also be checked for secure fixings, with any barrier signage reviewed to make sure the message is still current.
For a more detailed guide to Absolute’s barrier range, read our article: Barrier Care and Maintenance
Labels and signage
Visitor contact takes a gradual toll
Because they sit right next to the artwork, labels are uniquely exposed, bearing the brunt of daily museum traffic. While a single tilted holder or curling edge might go unnoticed on its own, a dozen of these tiny oversights across a gallery compromise the exhibition's finish.
We recommend hanging labels at a consistent height of around 150cm, at a consistent distance from each work, with runs aligned horizontally. One holder knocked out of line draws the eye immediately, so check alignment during the weekly walk-through. Smaller sizes of our Label Holder use a single screw fixing to aid positioning and levelling, which makes re-levelling a quick job, and it is advisable to confirm at the same time that the fixing itself has not loosened.
Printed inserts fade under gallery lighting and can cockle with changes in humidity. Because the cover slides to one side for access, replacing an insert takes but a moment, and our holders accept paper up to 120gsm. If label sizes have drifted over successive exhibitions, a reprint is a good opportunity to return to one consistent label size across a gallery, which gives a more cohesive finish.
Acrylic covers that have become scratched or clouded reduce readability, particularly under directional lighting. Low-reflective covers help minimise glare, and replacing a damaged holder is a quick, low-cost fix. The Pinnacle Label Holder range is fully modular, so label holders and posts can be swapped individually as needs change, and its 3D printed label adaptor is designed for improved label stability.
Inside display cases, use each case opening as a chance to check Display Case Label Holders and Shelf Edge Label Holders. Shelf Edge Label Holders attach with clips to shelves up to 10mm thick, with replacement Shelf Edge Clips available. Finally, review temporary messaging on Information Stands and Reader Rails. A closure notice that has outlived the closure can confuse visitors and undermine confidence in the rest of your signage.
![]()
Hanging hardware between exhibitions
Changeover is the best moment to audit
With walls cleared and works in storage, a changeover offers the clearest view of your hanging hardware. Start with security components. If you use Secure or High Security Ryman Hanger sets, count spring keepers in and out so none go missing between shows. Each Ryman Security Key is individually numbered with its owner listed, so a changeover is the right time to audit the key register and confirm every key is accounted for.
Next, check the weight ratings of your hardware against the incoming works, since last season’s setup may not suit the next. Small Ryman sets are tested for weights up to 25kg, Large sets up to 75kg and Extended sets up to 150kg. The Link Hanger supports artworks up to 150kg while the Chain Hanger up to 30kg, in each case with the installation surface permitting.
The slotted mounting holes on the Ryman Hanger allow fine adjustment without drilling new holes, and when used with Absolute’s Storage Hooks, works can move between display and storage on the same hanger, reducing handling of the frame. The same hanger also works with our track and panel clip hanging systems, so one fixing on the back of the frame serves the work wherever it goes.
On track systems, inspect hanging sets, cables, rods and hooks for wear, and replace any cable showing kinks or fraying. On H Track and C Track, the hanging set top blocks load from an access mouth on the underside of each length, so it must remain intact whenever sections are cut or extended. Our H Track and T Track designs were updated in July and August 2025. If you are extending or repairing an existing run and need it to match, please contact us, as we may still hold older stock.
Changeover is also the time to fill and touch up wall fixings from the previous hang. Track systems and adjustable hangers keep new holes to a minimum, which shortens that job considerably over the life of a gallery.
Cleaning display equipment safely
Gentle methods protect finishes for longer
Our products are made predominantly from stainless steel, aluminium and acrylic, and each benefits from a considered approach. For acrylic covers, use a soft microfibre cloth with mild soap and water. Avoid ammonia-based glass cleaners and solvents such as acetone, which can crack acrylic and leave a frosted finish, and avoid paper towels, which can leave fine scratches. For stainless steel and anodised aluminium, a damp cloth with mild detergent, followed by a dry cloth, is sufficient. Avoid bleach and chloride-based cleaners on stainless steel, as they can mark the surface over time.
Cleaning teams handle display equipment more often than anyone in a gallery or museum. A short briefing on how barriers, cords, and freestanding labels come apart and go back together ensures everything is reassembled correctly after floors are cleaned, with cords seated, caps fitted, and labels returned to their marked positions.
![]()
Spares and reordering
A small stock keeps galleries tidy on busy days
The components most likely to need replacing are small and inexpensive compared with the parent equipment: elasticated cord, top caps, label holders in standard sizes, signage adaptors, shelf edge clips and Ryman spring keepers. Keeping a few of each in a labelled store means a fix takes minutes, with no wait for a delivery in the middle of a busy season.
Record the product names, sizes, finishes and cord colours you use across the site, so that reorders match what is already installed. Replaceable components are a core feature of how we design. The parts that carry the load and set the look, such as steel bases and uprights and aluminium backplates, are made for many years of daily use, while the parts that take the most wear are designed to be swapped in minutes.
Replacing a cap or a length of cord keeps a barrier in service for years longer, protecting budgets and keeping equipment out of landfill. We explore the theme further in a recent article, Why High-Quality Museum Equipment is the Sustainable Choice.
Download the gallery maintenance checklist
A practical companion for your team
In a well-maintained gallery or museum, a visitor’s attention is captured entirely by the artwork and the space around it. To maintain those standards, success relies on small, regular checks carried out by the frontline team. Equipment designed to be durable and repairable makes that routine simpler, and means most checks end in a quick fix.
If you would like advice on maintaining or extending your existing Absolute equipment, or on matching components to an installation, please get in touch. With more than three decades of experience designing and manufacturing museum-grade equipment, our team would be happy to help.
Download gallery maintenance checklist

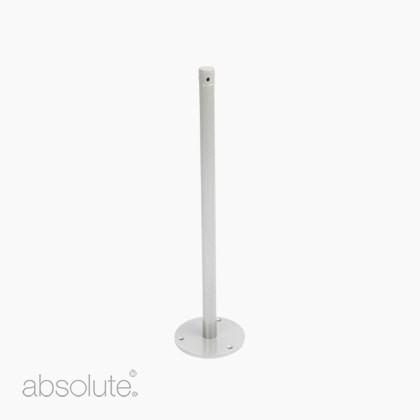 Steadfast® Surface Mounted Barrierfrom $132.30 (ex VAT)
")
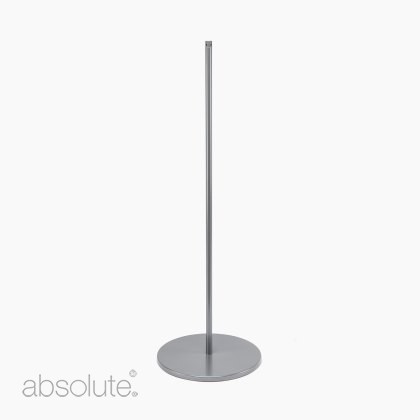 Steadfast® Freestanding Barrier (1000mm)from $320.46 (ex VAT)
")
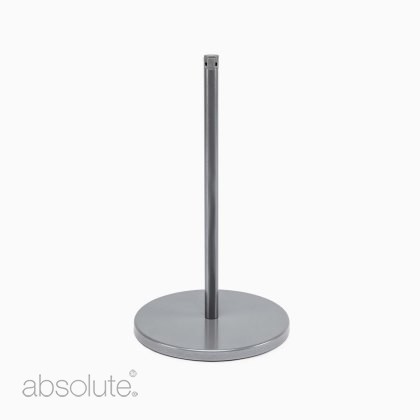 Steadfast® Freestanding Barrier (400mm)from $188.16 (ex VAT)
-
Posted by Jack Turner
17th November 2026